|
Tubular Upper & Lower Control Arm
Install
1.
Raise the vehicle and support it with
jack stands. Don't put the stands under the rear axles as you will
be jacking it up and down at those points. Remove the wheels.
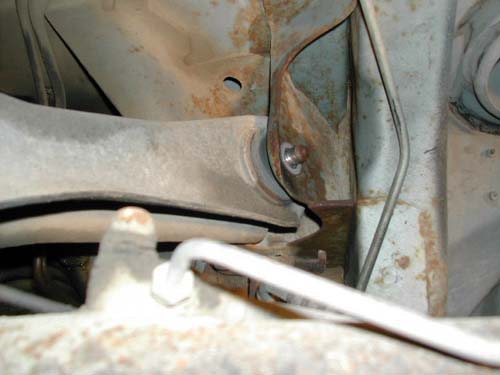
2. Remove the bolts from the
upper control arms (see pic), doing one side at a time. Remove the
factory stamped arm and install the tubular upper arm. Be sure to
grease the bushing before forcing it into place. This will prevent
squeaking and premature wear.

3.
Remove the rear sway bar.
4. Doing one side at a time,
put a floor jack under each control arm and remove the rear bolt.
Slowly release the jack to allow the control arm to come down. This
will release the spring as well. You may have to jack up the other
side to get the spring to come out. Remove the rubber spring
isolators from the stock control arms, these will be reused.
5. Remove the front bolt and
remove the control arm.
6. Install the tubular control
arm after greasing the bushings. You may need to stretch the
mounting brackets back out to factory spec before installing. These
will be a very tight fit. Use a rubber mallet to beat on the arms to
coerce them to slide into place. Once they are aligned with the bolt
hole, install the bolts (front and rear).
7. Re-install
the sway bar. Grease the bushings every 10-15k miles to prevent
squeaking and premature wear.
***If your car came with quad shocks it is recommended that they are
removed. This product performs optimally without the quad shocks in
place.
If you have any questions about any of these procedures feel free to
contact us
HERE
©
Stinger Performance Engineering 2016 |


