|
|
||||||||||||||||||||||||||||||||||||||||
|
Turbo Swap Documentation Here is the documentation of my swap. This covers my turbo swap from rebuild to completion.
Remember that I chose to do
a lot of things that aren't necessary for the swap. Most of these
things are simply performance enhancing tricks that I chose to do while I
was at it. Not every step needs to be followed to do the swap.
Also note that this is documentation of a 91-93 Mustang using an 85.5-86
Turbo Coupe drivetrain. There will be slight differences if
different years are used.
If you want a
printable checklist while you are doing the swap, left-click or
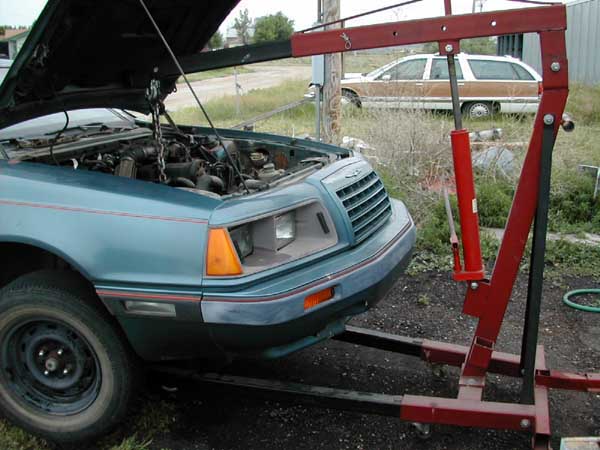
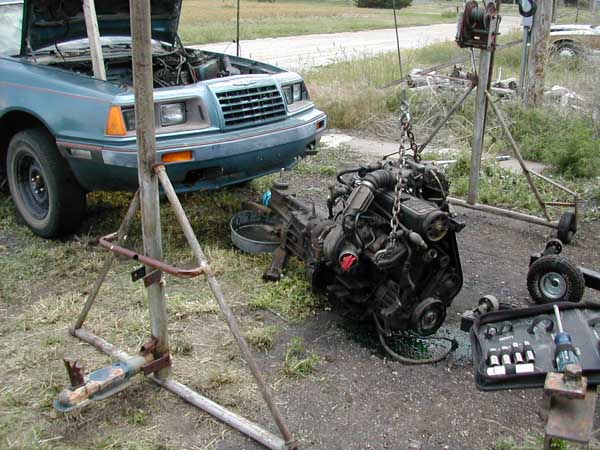
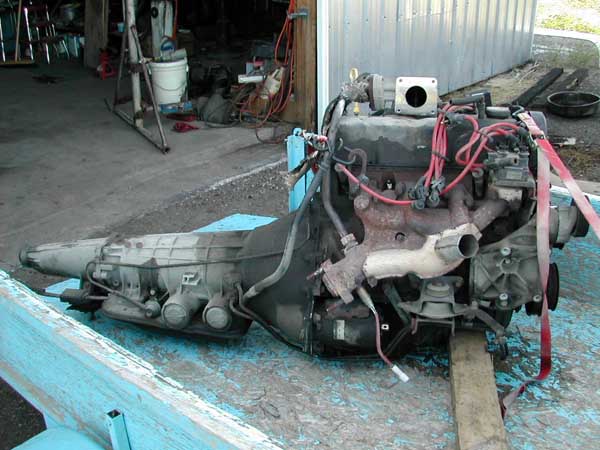
right-click/save-as here: I started with an 85.5 Thunderbird Turbo Coupe and yanked the engine, and tranny out of it. I plan to use the rearend as well at a later date. The engine had forged internals factory installed.
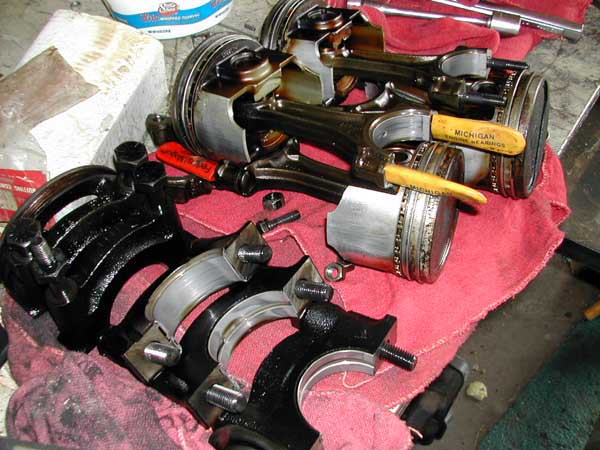
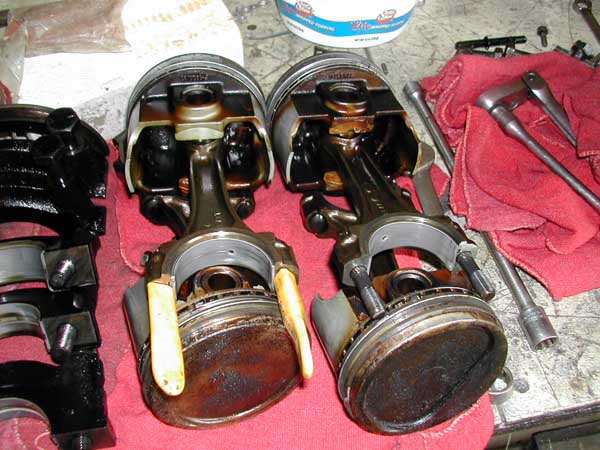
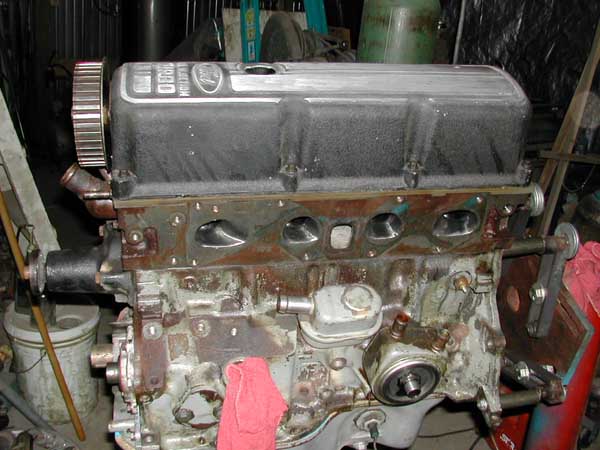
The next thing I did was tear down the turbo engine until it was a bare block. I then inspected all the internal components to make sure they were not damaged. Make sure to keep all the components together (#1 piston, rod, rod cap, bolts, etc.) It is very important that you don't mix these parts up if you plan to reuse them. It is easiest to put them in ziploc bags and number them accordingly.
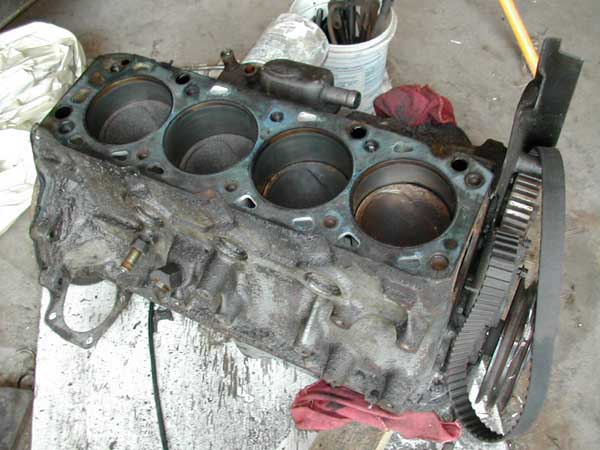
I then honed the block to cross-hatch the cylinder walls for proper ring seal. This was followed by a thorough cleaning to remove all the metal and grit from the hone.
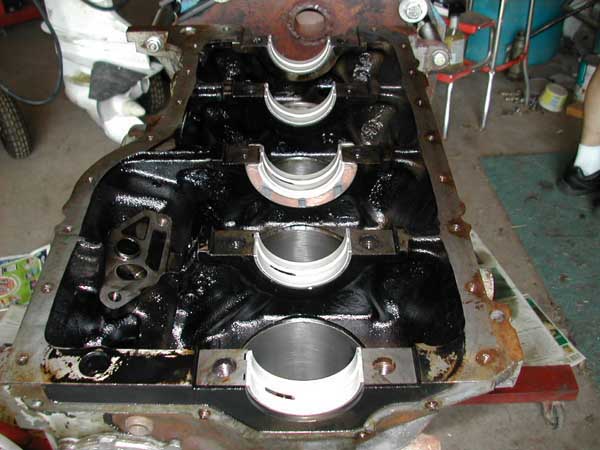
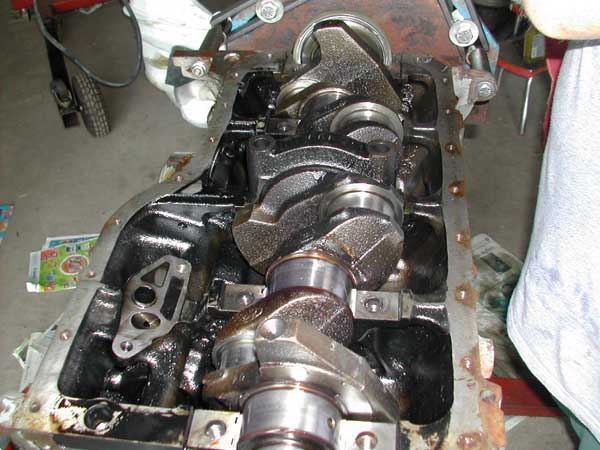
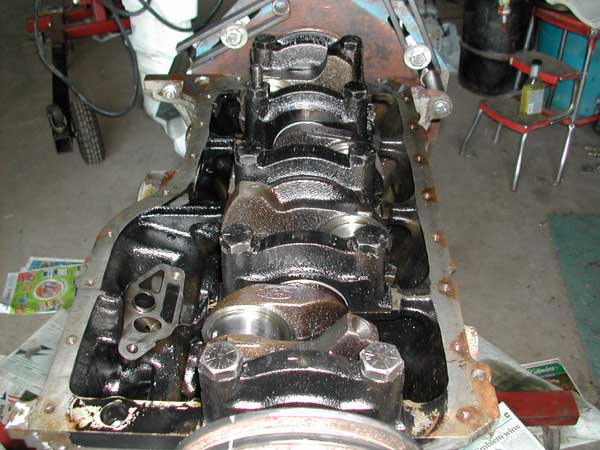
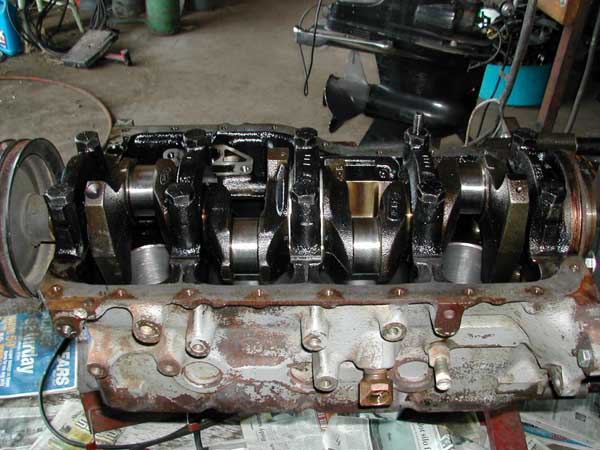
Once the block was thoroughly cleaned I installed the new main and rod bearings. Make sure to use plenty assembly lube during the rebuild process. After coating the bearings with lube I lowered the crankshaft into place and gave the bolts the proper torque. Make sure to rotate the crank occasionally while tightening it down to make sure it isn't getting bound up.
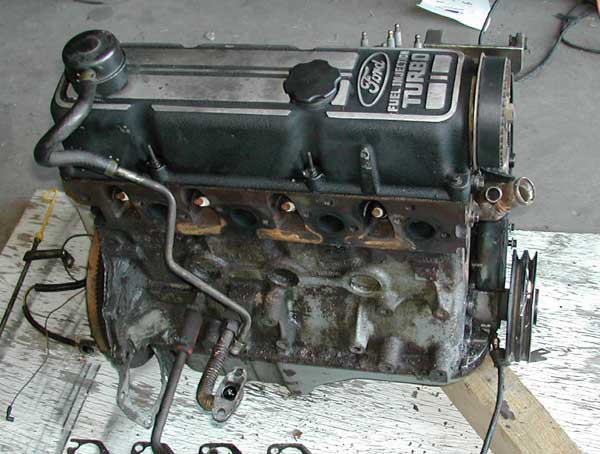
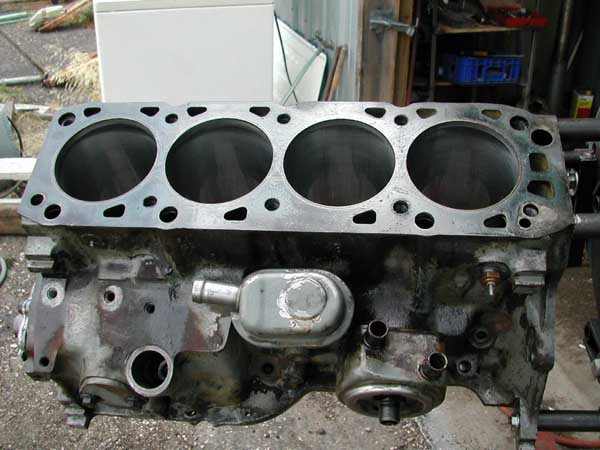
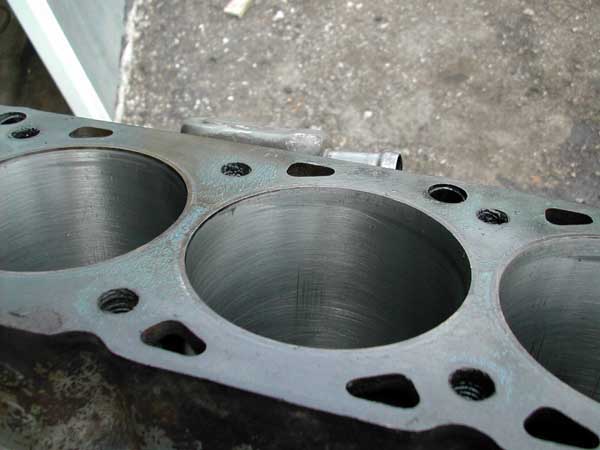
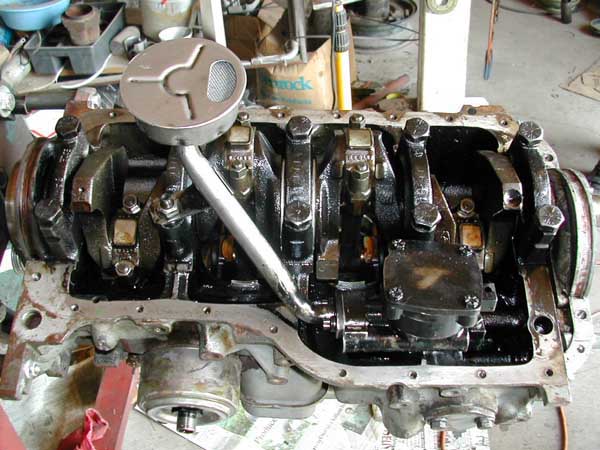
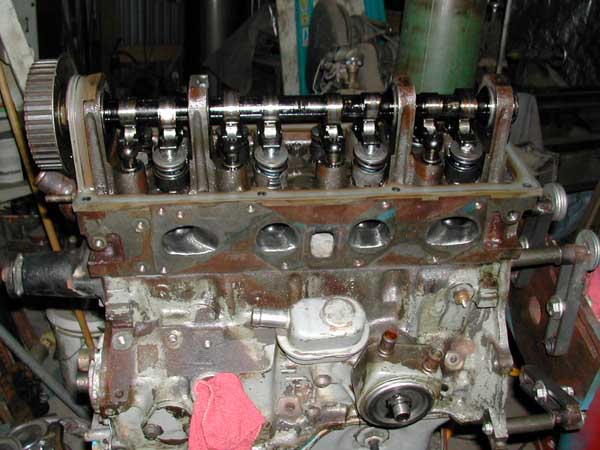
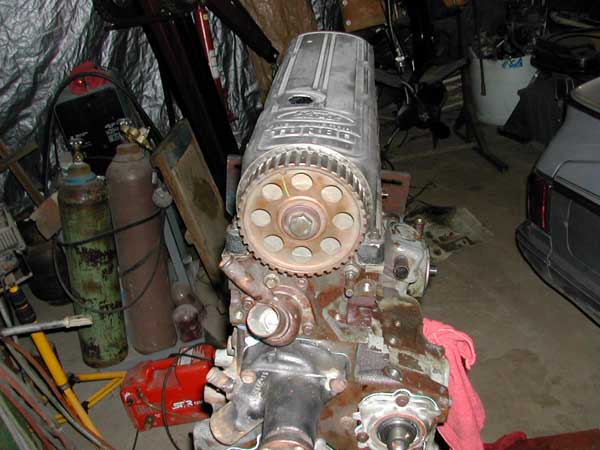
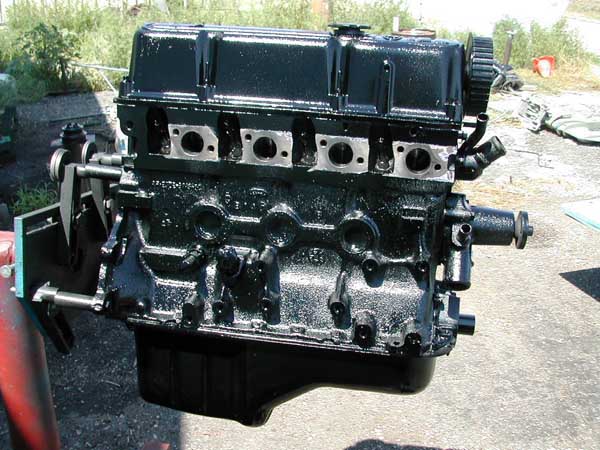
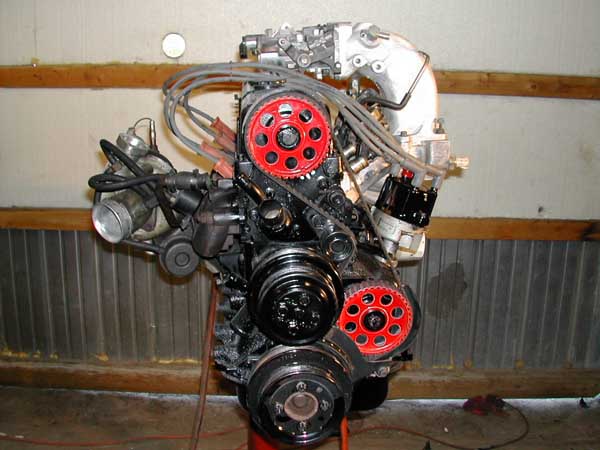
I then cleaned the pistons to remove any carbon build up and used a ring groove cleaner to remove buildup from the ring grooves. Once the grooves were clean I installed the new rings being sure to space the ring gaps apart from each other about 120 degrees. I then used a ring compressor and pushed the pistons into their respective cylinders. Make sure to use rod bolt covers to keep from scarring the crankshaft when installing the piston and rod assemblies. Again, make sure you lube the crank journals, bearing surfaces, and piston rings before installing the components. I then bolted the rod caps down to the proper torque. Make sure you rotate the crank after tightening the rod bolts to make sure it still spins freely. The oil pump and gasket will need to be installed during the process as well. Once the shortblock was assembled I installed the oil pan with a reusable rubber gasket and torqued the bolts down to proper spec. This was followed by installation of the head gasket and head (The head was already inspected, cleaned, ported and polished, gasket matched, and the new roller cam was installed). I then installed the cam cover with a reusable rubber gasket and torqued the bolts to 12 in/lbs. I now had an assembled long block capable of withstanding 450+ horsepower.
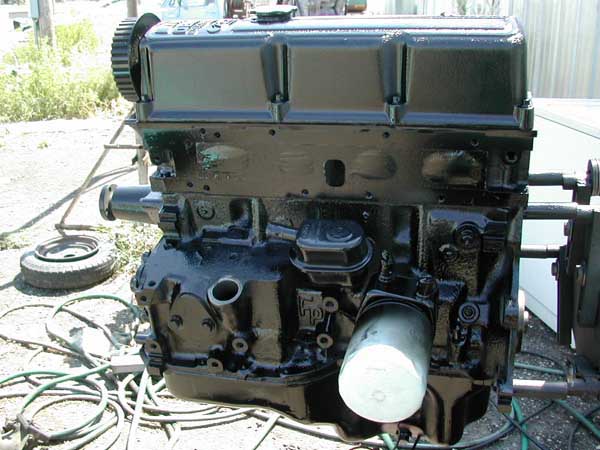
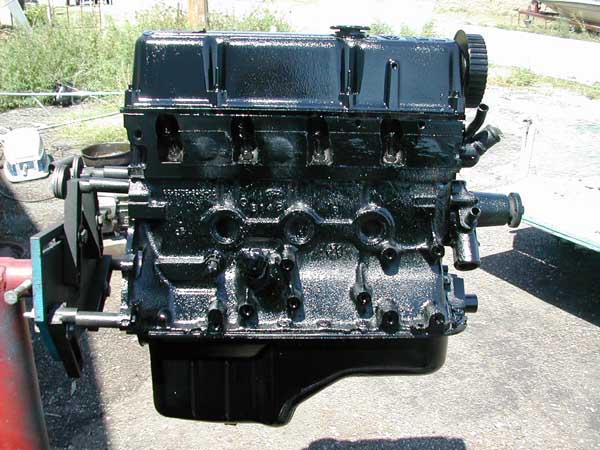
The next step for me was to plug or tape off all the holes that would allow foreign materials or water to enter the block and then spray it down with degreaser and power wash it off again. This included installing the water pump and oil filter. After all the oil appeared to be gone I sprayed the block with prep-sol to remove any oil residue and then sprayed acetone over it to remove the prep-sol. I then sprayed the entire longblock with automotive primer followed by 4 coats of jet black automotive paint.
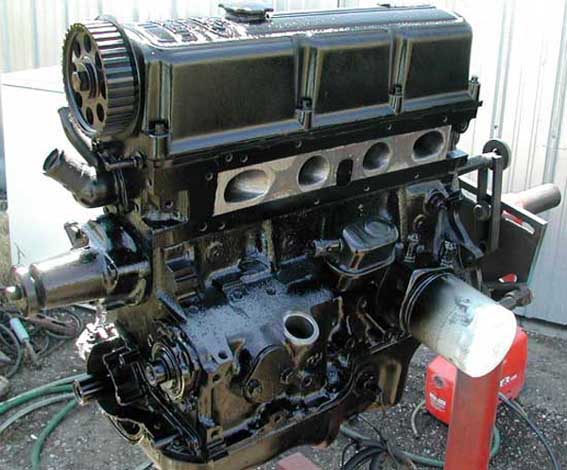
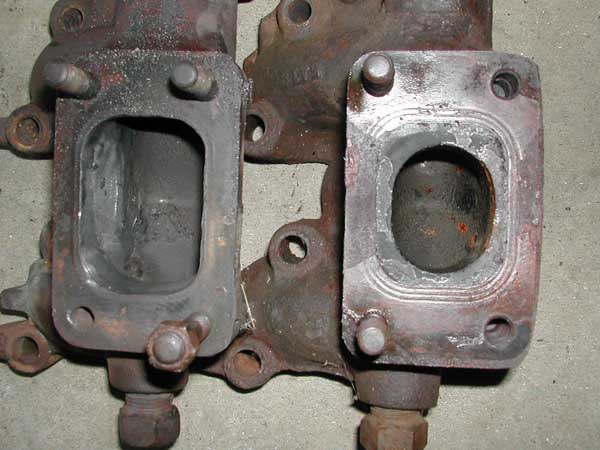
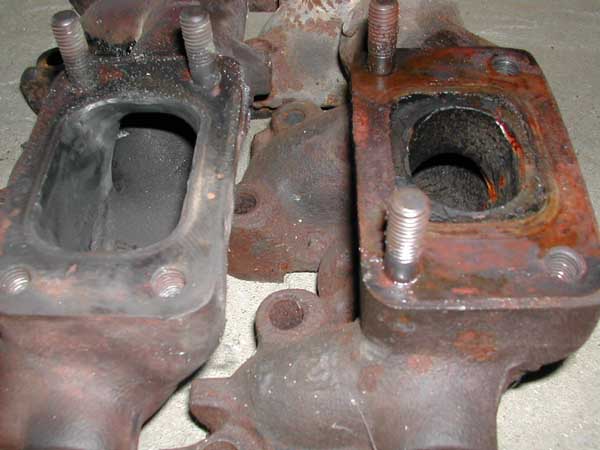
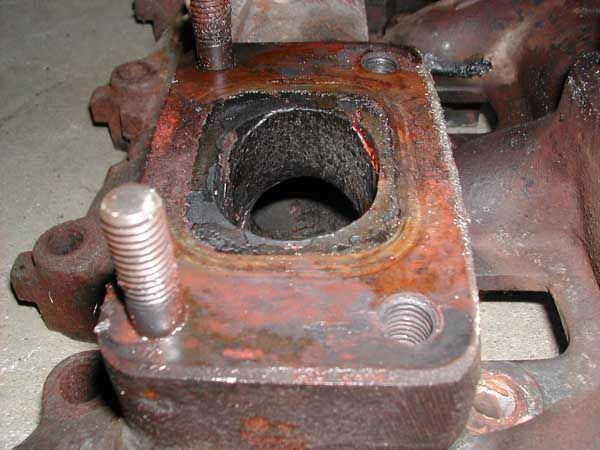
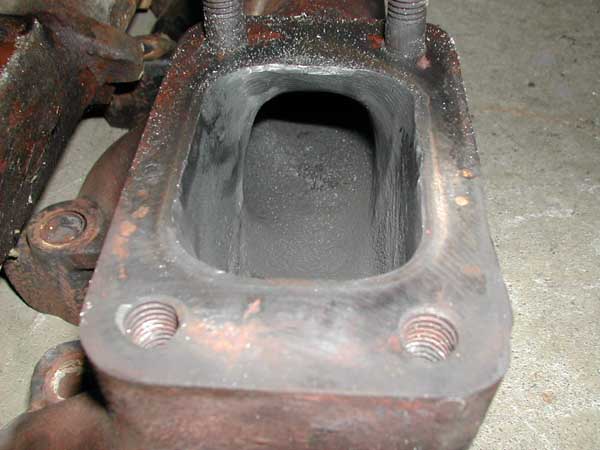
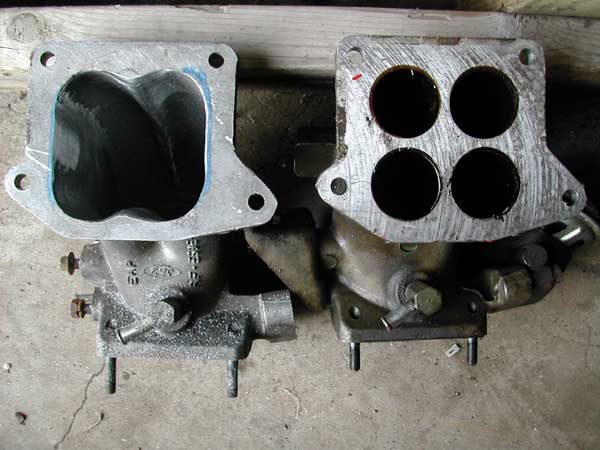
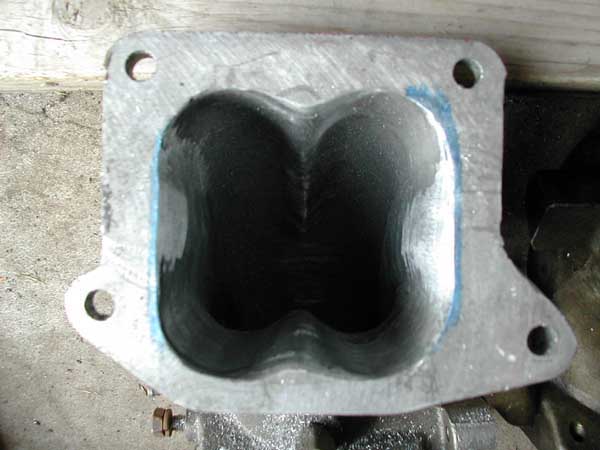
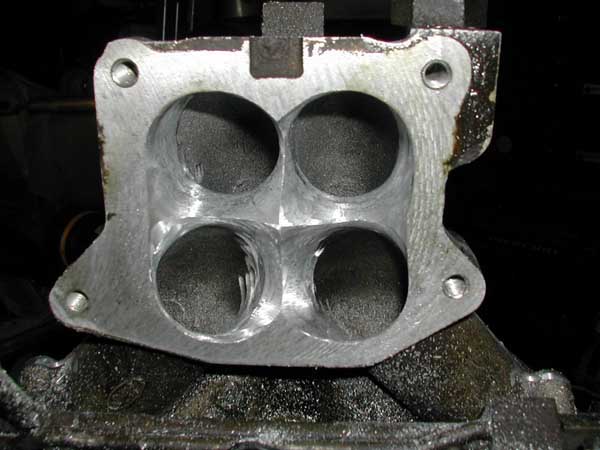
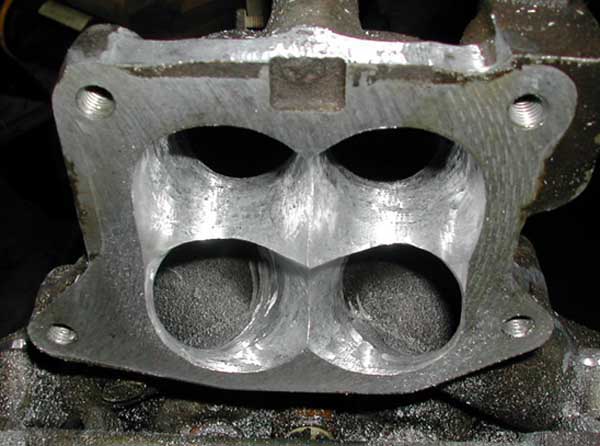
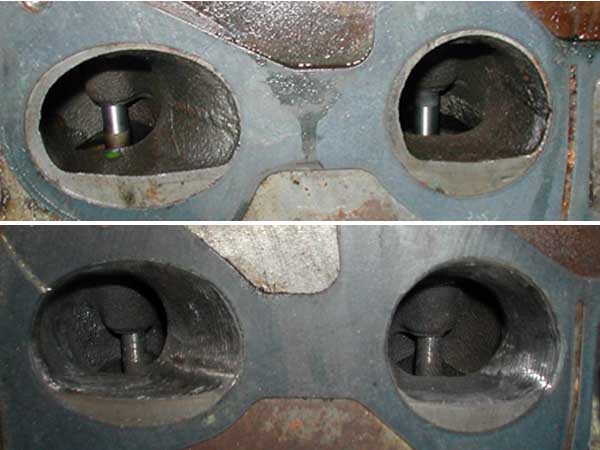
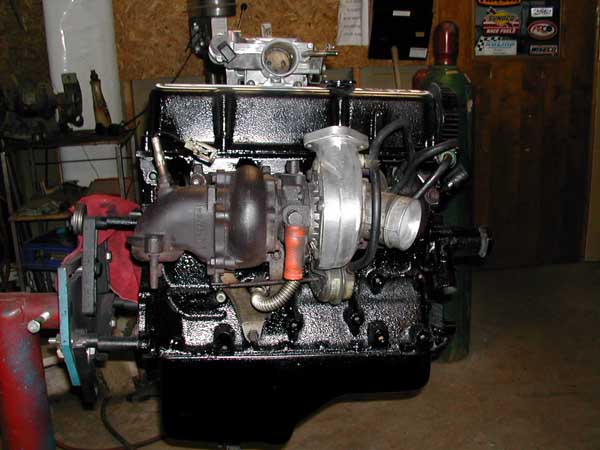
I then gutted the upper intake, ported the lower intake, gasket matched the ports, smoothed the throttle body, ported and smoothed the turbo housing, and ported the exhaust manifold. I then cut the gaskets to match the newly ported parts and installed them. You can see comparisons of the unported exhaust manifold against the ported one and the gutted intake compared to the stock one with 4 holes (instead of one big hole) below.
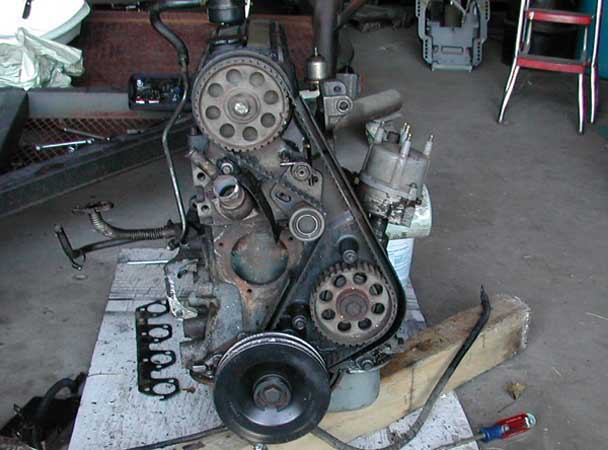
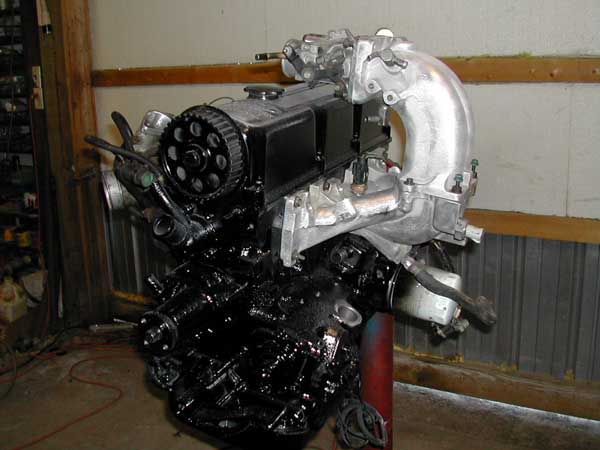
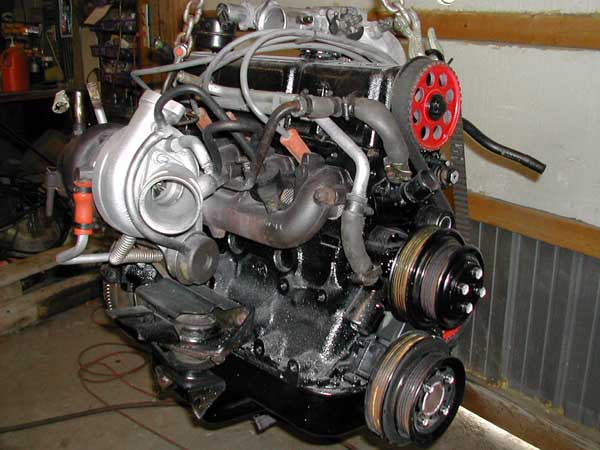
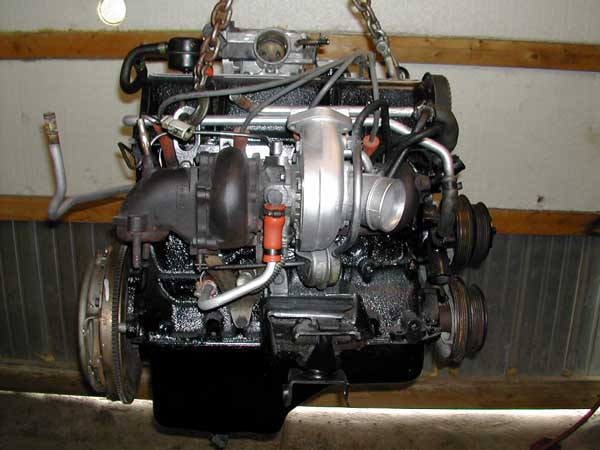
The next step was to install the intake, throttle body, exhaust manifold, and turbo. Then I installed the injector rail, coolant lines, turbo oil line, oil sender, distributor, pulleys, spark plugs, plug wires, timing belt, motor mounts, flywheel, clutch disc, and pressure plate. The engine needs to be rotated to Top Dead Center (TDC) before installing the timing belt and distributor. Make sure the rotor is pointing towards the #1 location of the distributor cap before installing it. The cam must be rotated so the mark lines up with the lines on the timing cover and then the belt can be installed. Once it's done, triple check that everything is still lined up like it is supposed to be before moving on. The next thing to do is to install the accessory pulleys. You should also install your flywheel, clutch disc, and pressure plate at this point. If you plan to run a front mount intercooler then I suggest you rotate the turbo housing now so you don't have to fight it once it's installed (I learned the hard way). You want the get the turbo outlet to point straight up instead of pointing towards the throttle body. The engine is now complete and ready to be installed.
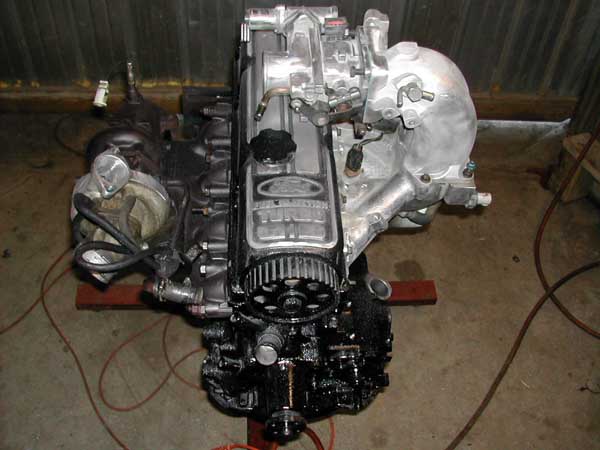
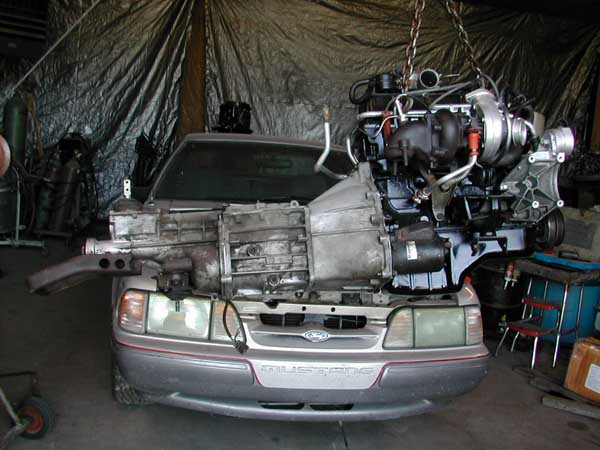
I Then installed a new throwout bearing in the tranny, cleaned the ford and dogbone cable and prepared the tranny for installation. I then bolted it onto the engine, making sure everything lined up correctly. Don't forget to insert the aluminum plate between the block and transmission. You can now install the starter if you don't want to do it once it's in the car.
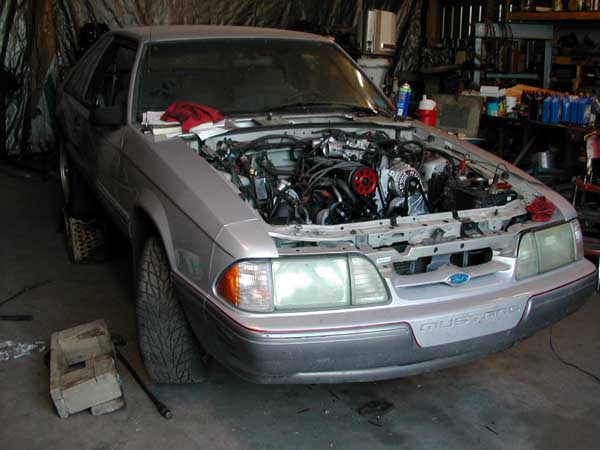
If you haven't already removed the old engine then now is the time to do so. I removed the engine and tranny together, some people prefer to remove them separately. I chose to leave the A/C compressor and lines all hooked up since it will be reused. I also left the power steering pump and lines attached and in the car since they also would be used with the new engine. Make sure to remove the airbox, intake tube, and airbox bracket, they will not be used.
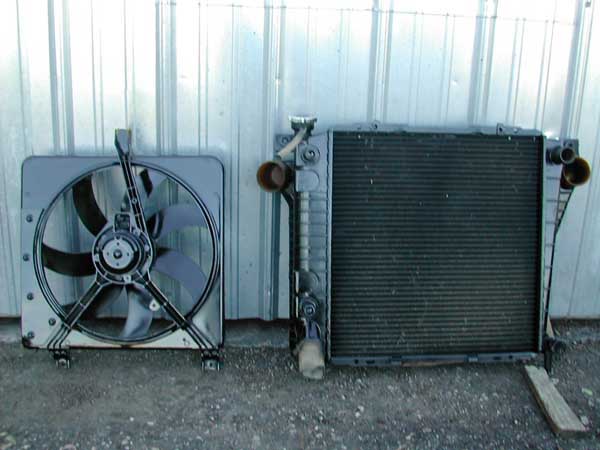
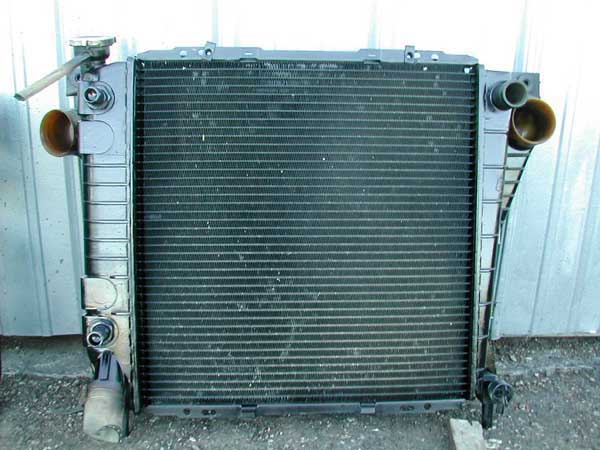
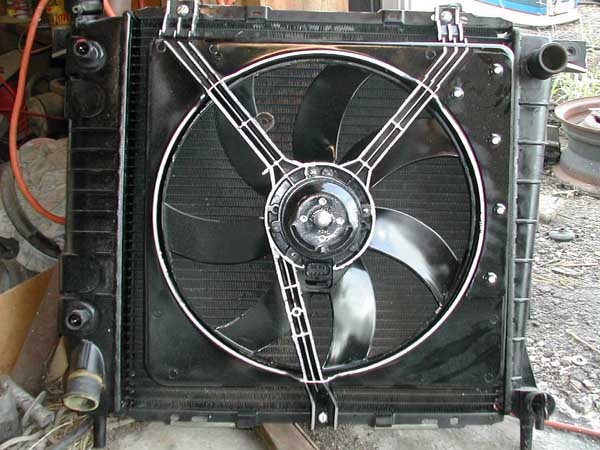
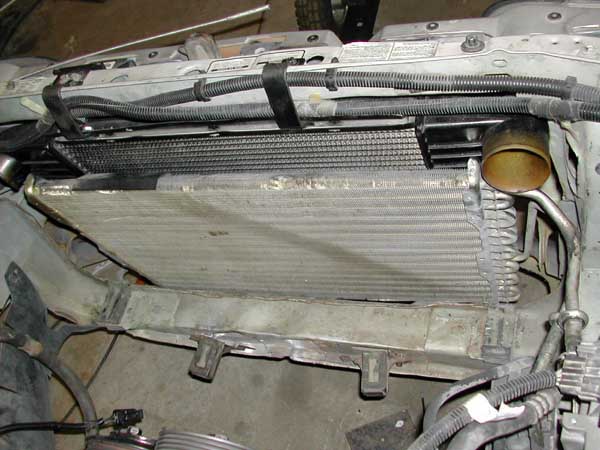
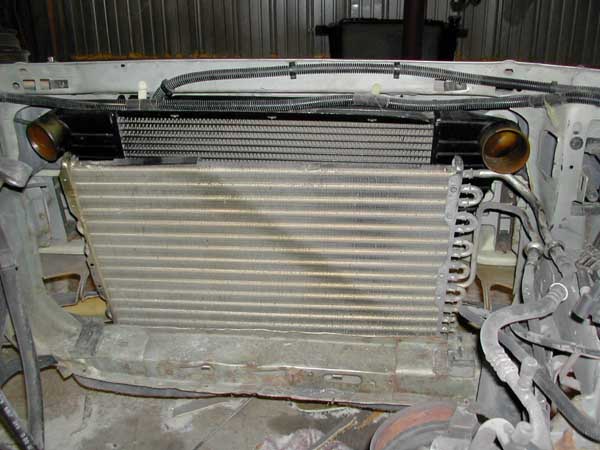
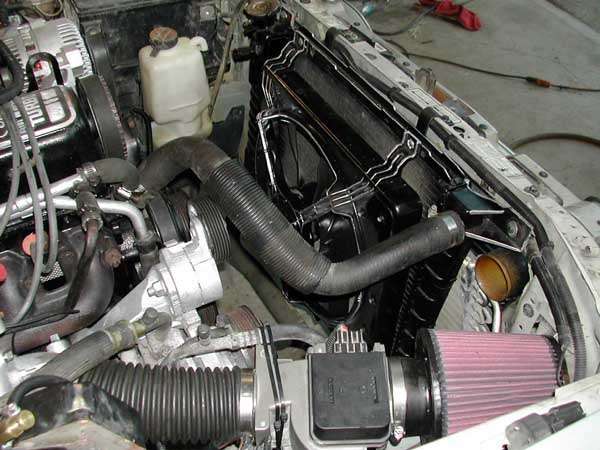
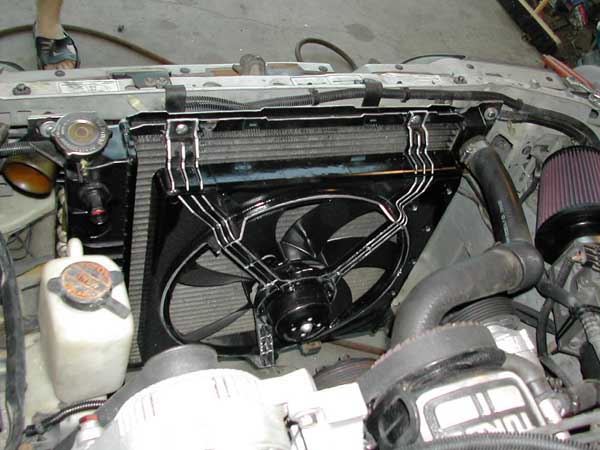
This is a perfect time to install the front mount intercooler. You will need to build custom brackets to mount it. You can also build you new radiator brackets now and trial fit the radiator. Don't install the IC or radiator yet though, they will get in the way during engine installation. Note how the intercooler fits perfectly behind the Ranger radiator (19.5"h x 23"w) in the first and second pictures as well as how the fan fits the radiator in the third pic.
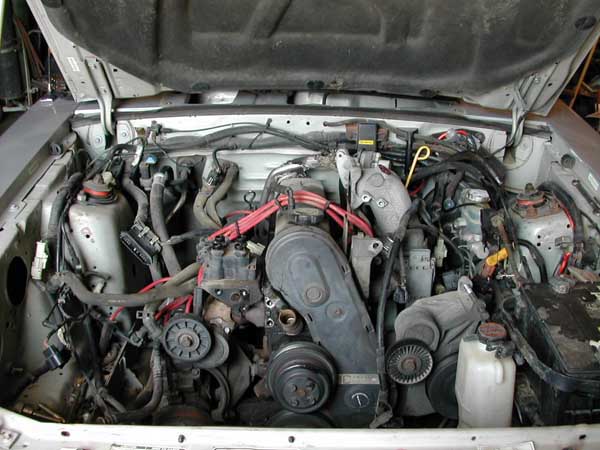
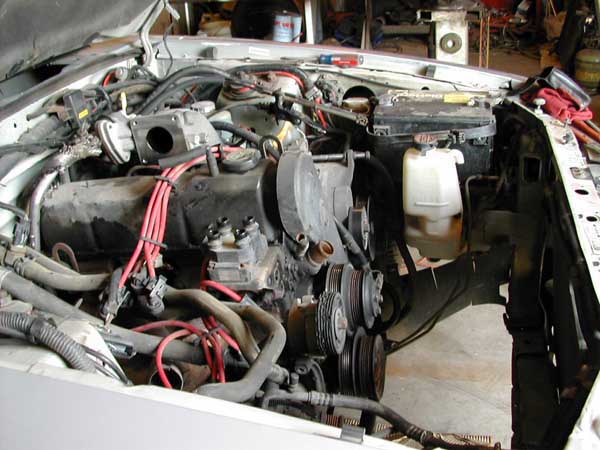
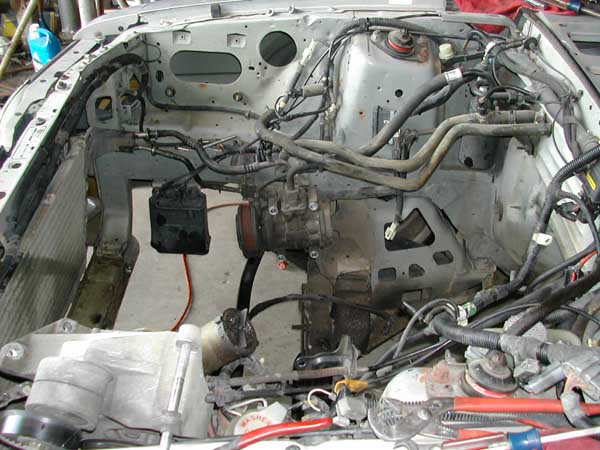
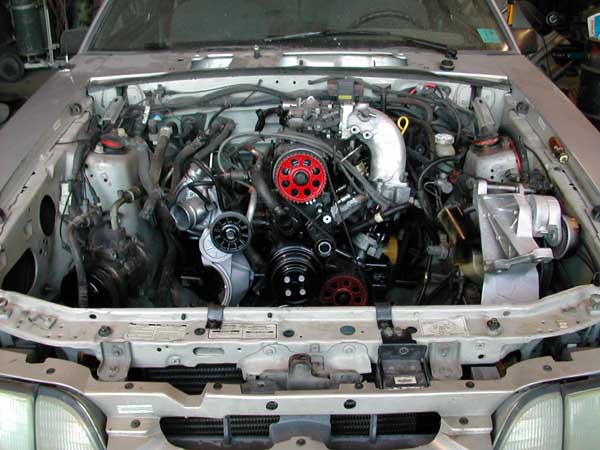
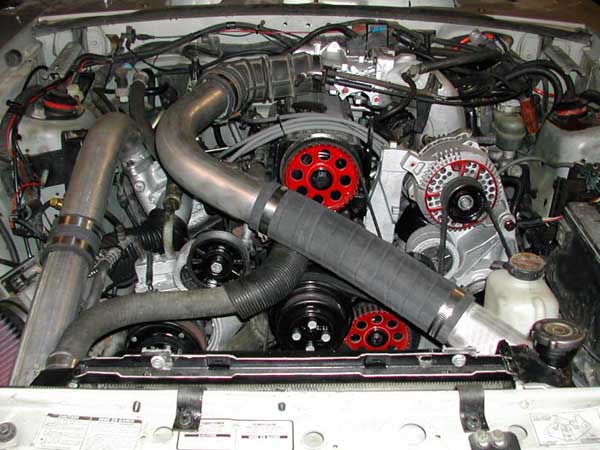
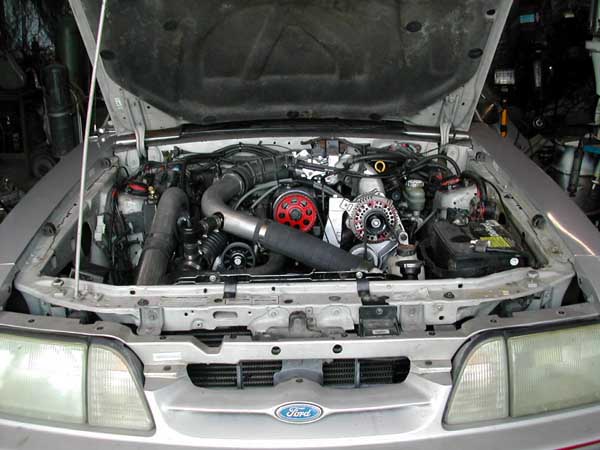
The next logical step is to drop it into the car. I had previously power-washed the entire engine bay to remove all the dirt, oil, and grease from it. Make sure you have the motor mount bolts handy, as well as the tranny crossmember and bolts (see detailed info that covers the entire tranny swap HERE). The actual installation is pretty straight forward. Now would be a good time to pour oil in the engine so you don't forget about it once it's installed. You can now install the power steering pump and A/C compressor. I had to bend the compressor lines to get them to clear the turbo. You can now install the accessory belts.
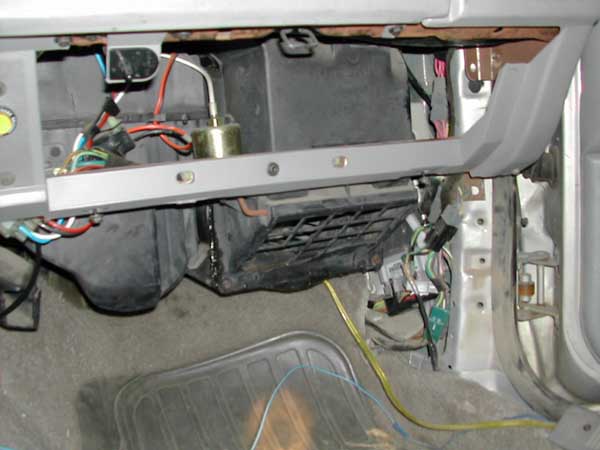
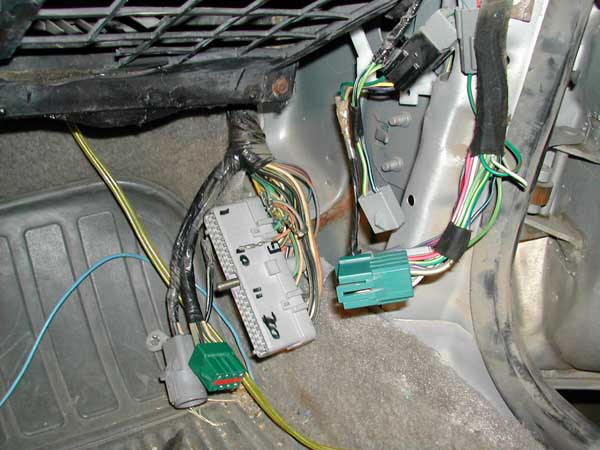
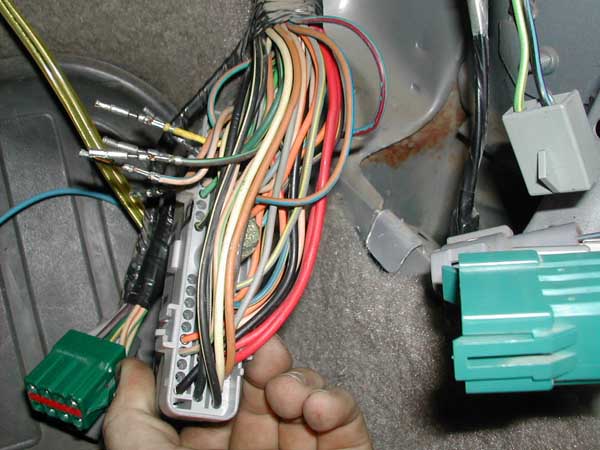
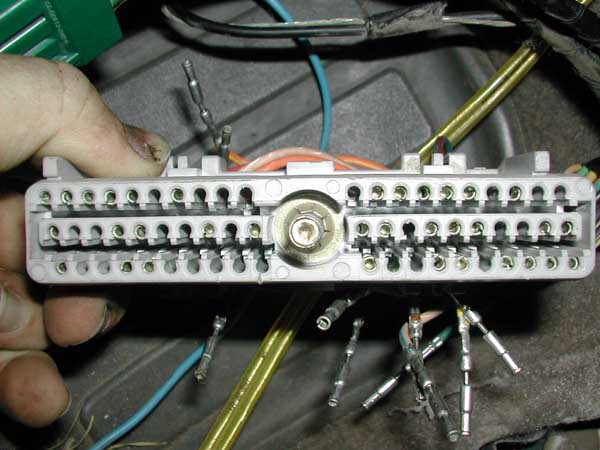
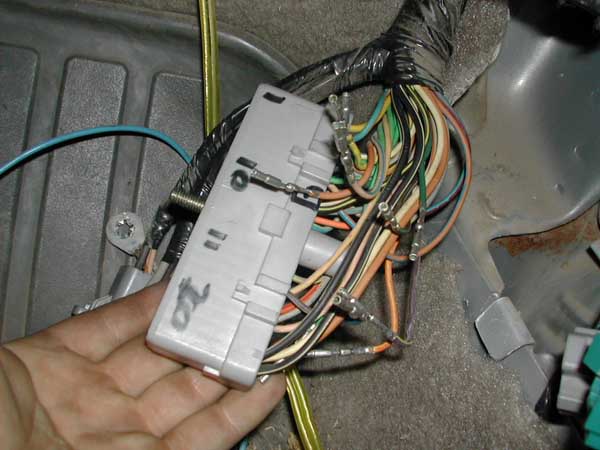
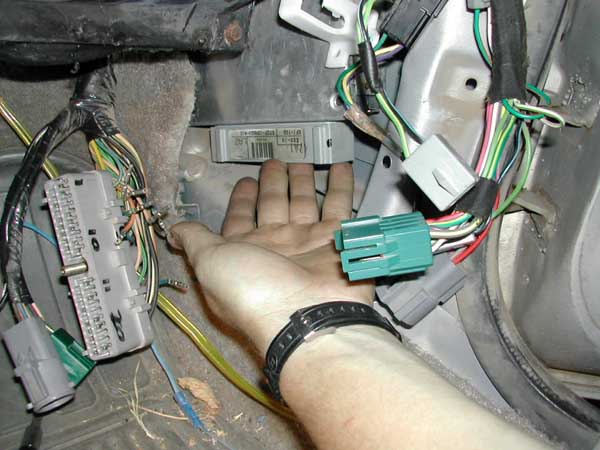
I would suggest that you now do all the wiring modifications, computer pin changes, and the computer swap if you haven't already done so (see my turbo swap wiring page HERE for detailed info). Once the ignition harness is rewired you can install it and plug in all the sensors. Make sure you don't miss the oil sender and temperature sender located on the block. They are small and easy to miss. You should also remember to hook up the starter wire, ground straps, coil, tranny wires, clutch cable, speedometer cable, driveshaft, and shifter.
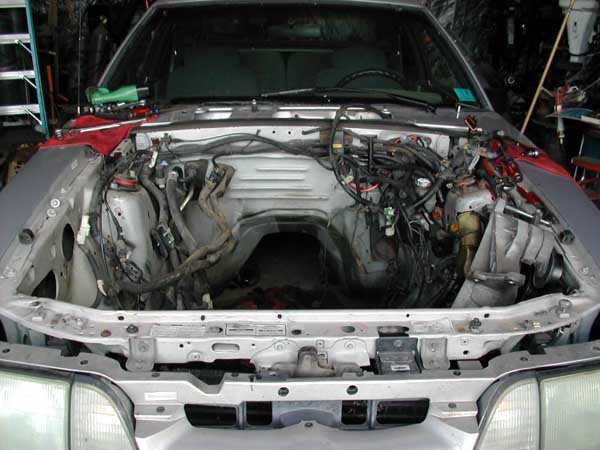
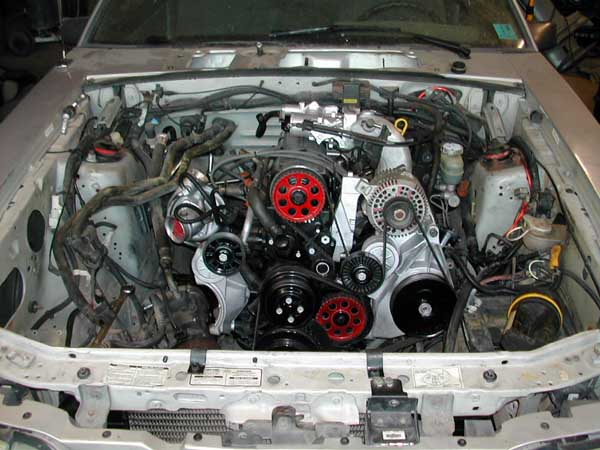
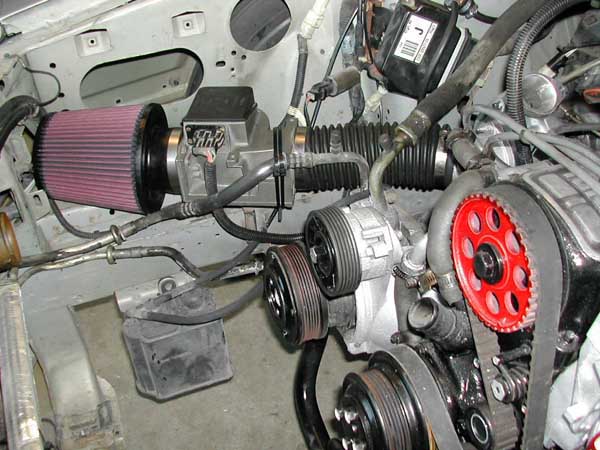
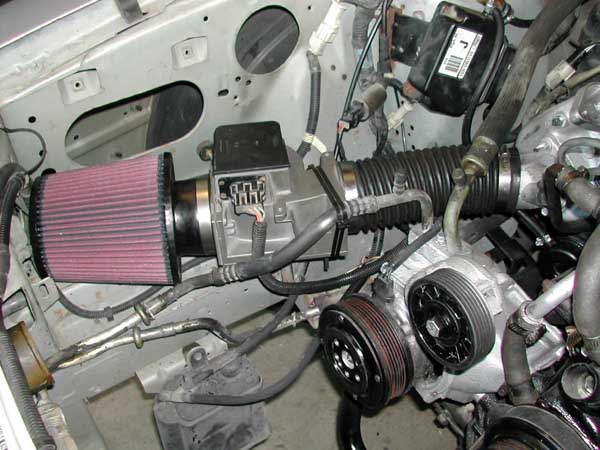
The next thing to do is install the VAM, air filter assembly, intake tube, and the battery. The VAM, filter, and intake can be done many different ways. The best thing to do is just decide how you want to do it and go from there. The radiator and fan setup can now be installed. This will vary depending on what setup you choose to use. I used a Ford Ranger radiator and Pontiac Sunbird fan...it worked perfect. Be sure to fill the radiator with antifreeze and water (I've known people that forget to do this). If you still have the old tube that went from the turbo outlet to the throttle body you should be able to fire the engine up at this point if you want to. I would advise against doing this...(you will get overly excited and start forgetting to do all sorts of things just so you can rush the job and get it finished). Here are pics of the easiest way to do the intake, I did it this way so I could start the engine. You will see later that I made a cold air induction system before it was all said and done.
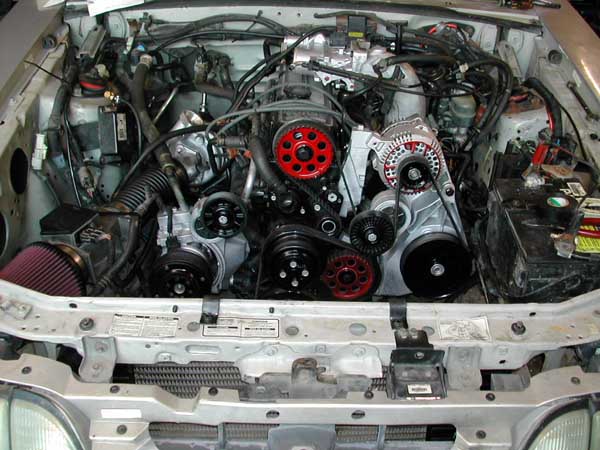
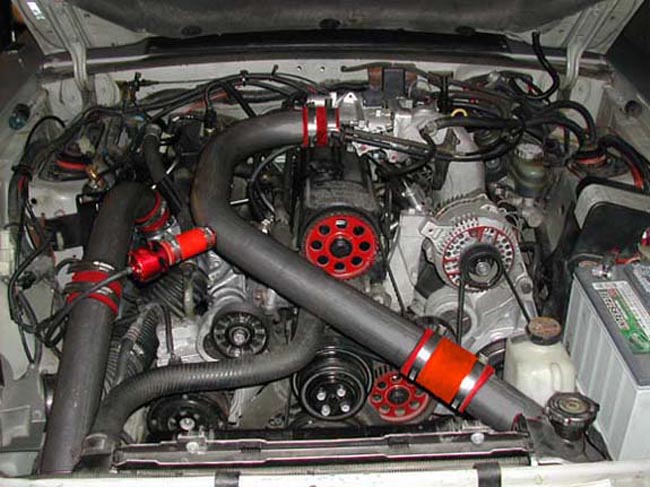
Intercooler tubing was the next thing I did. I used mandrel bent 90* 2.5" exhaust tubing for my setup. The tubing routing will vary depending on your intake setup (rotated or factory), type of intercooler, as well as your own ingenuity and design skills. You will need to fabricate a plate and flared pipe that will allow you to mount the 2.5" tubing to the 1.5-2" turbo outlet. I used 2.5" radiator hose and hose clamps to connect the tubing. Note the rubber bend near the throttle body is the one that was originally on my old engine. This will not hold up to the pressure of a turbo, I blew a hole in it the second time I drove it. I ended up bending another piece of pipe and installing it in it's place. Also notice that the bypass valve is installed in the last two pics. It is between the IC tubing and intake.
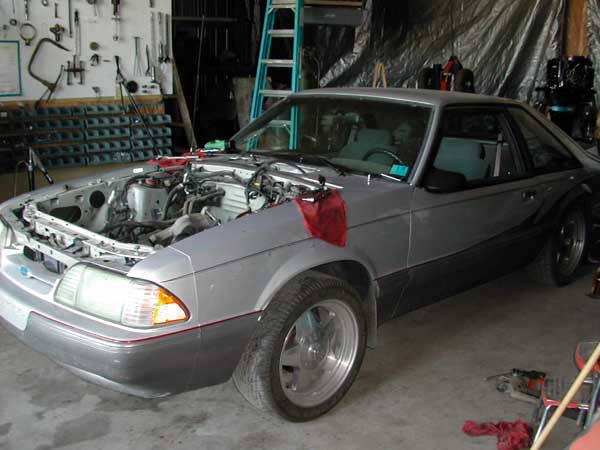
There are still some small things that you will need to do but for the most part the swap is done. The rest of the details are just common sense (fuel lines--see info HERE, timing (set to 10* btdc initially, etc.) The final product can be seen below. This is after I welded up the IC Tubing, installed the Bailey Evo Blow Off Valve, and installed the Kirban Adjustable Fuel Pressure Regulator...more to come later.
© Stinger Performance Engineering 2016 |
|||||||||||||||||||||||||||||||||||||||